Description
Change mode
Change between the default LED colour (red, blue, green battery levels) and your custom colours by holding the right button for 1 second and release the button.
Change colour brightness in default LED colour mode
When you are using the default LED colour, hold the left button for 1 second and release it. You will see the left LED change to white to indicate changing brightness. You can press the left/right button to adjust the LED brightness. Hold the left button again to save the setting.
Customise the colour, change between AA/LiPo and reduce battery level set points
The default colour is red for low battery, blue for medium and green for high.
– Press and hold the left button for 1 second and release.
– A red slow blinking LED will appear on the right, you can press the left/right button to adjust the red LED brightness for the low battery setting. Hold the left button for 1 second and release to proceed to the next colour of blue then green.
– Press and hold the left button for 1 second to move on to the medium battery LED colours setting for red, blue and green. You should notice that the speed of the right blinking LED increased.
– Press and hold the left button for 1 second to move on to the high battery LED colours setting for red, blue and green.
– Press and hold the left button for 1 second to move to the battery mode. The left LED will be white. The right LED will show green for rechargeable 1.2v AAs and blue for LiPos.
– Press and hold the left button for 1 second to move to the battery level set point adjustment. This lowers the range if the battery LED change too quickly, say if you are using older AAs. The LED will be lit up less the more you lower it by pressing the right button. Press the left button to increase it. Most users should be able to skip this option.
– Finally, press and hold the left button for 1 second to save all the above settings
Installation
Open up your DMG. Remove the power LED with a soldering iron, you can add more solder and then gently remove the LED.
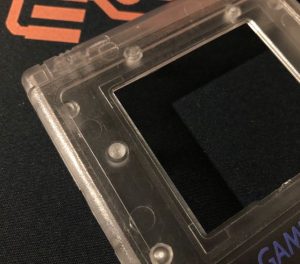
Gently push the included light pipe into place from the bottom side.

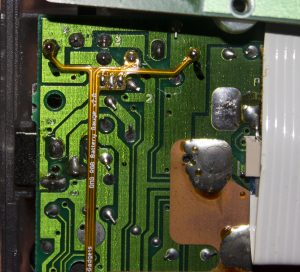
Solder the 3 points of the flex board as shown.

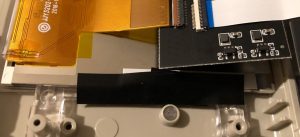
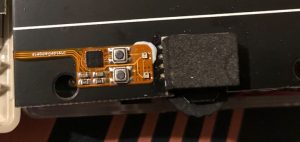
Place the DMG’s front PCB back into place and gently move the flex into the spot where the original LED was. You’ll need to tape it down to secure it in place. Be very careful when moving things around as there isn’t much slack on the flex board and it can be damaged.
We recommend placing some black tape so the LED doesn’t illuminate the side.


![[Discontinued] DMG Customisable RGB LED Battery Indicator](https://shop.insidegadgets.com/wp-content/uploads/2024/05/IMG_7435S.jpg)

![[Discontinued] DMG Customisable RGB LED Battery Indicator](https://shop.insidegadgets.com/wp-content/uploads/2024/05/IMG_7435S-324x324.jpg)
Reviews
There are no reviews yet.